Click on Add RECEIPT
The Job Admin module is where customer projects are setup and administered through various stages of completeness.
Receipts are placeholders for expected deliveries of goods to the warehouse. These are created in the system in advance of the actual pickup or delivery of the goods. The Receipt records hold information relative to the owner, customer, project, contracted revenue shares and equipment types.
Receipts have several status levels:
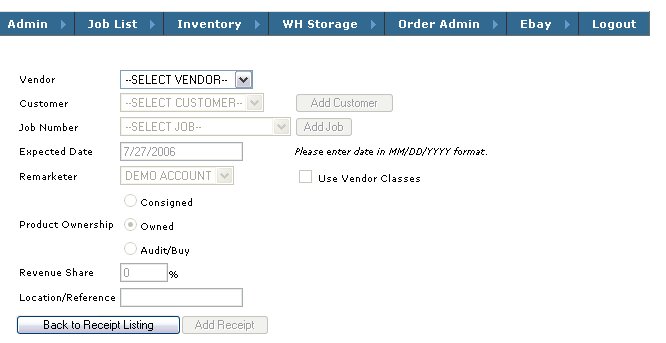
To Create a Pending Receipt:
Click on Add RECEIPT
There is a hierarchy of delineation within the Receipt structure which defines the breakdown of the Generator information for the product.
When creating a pending Receipt, there are several levels of identification which can be applied:
These are labels which can be customized (Vendor is often replaced with the tag of "Customer" and the "Customer"tag can be used to store Location or Cost Center information)
A good example of how the default - Vendor / Customer / Job tags are used when processing goods for a Vendor with subordinate entities or customers:
Vendor = Leasing Company
Customer = Leasing customer's End User customer
Job = Lease Schedule
Receipt = Delivery number
This structure is flexible and can be used for aggregating reports to each level of delineation - which is often useful to your customers.
Another example of how to use altered tags is as follows:
Customer (Vendor)
Location (Customer)
Job (Job)
Receipt (Receipt)
This delineation is useful for reporting purposes and will allow data to be aggregated in several ways
To complete the Receipt record:
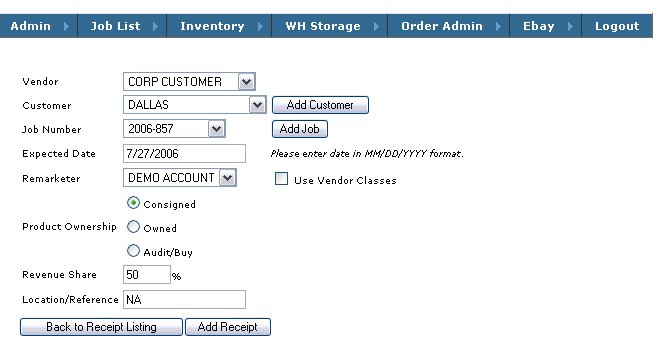
Click on Add Receipt.
Next Add Receipt Details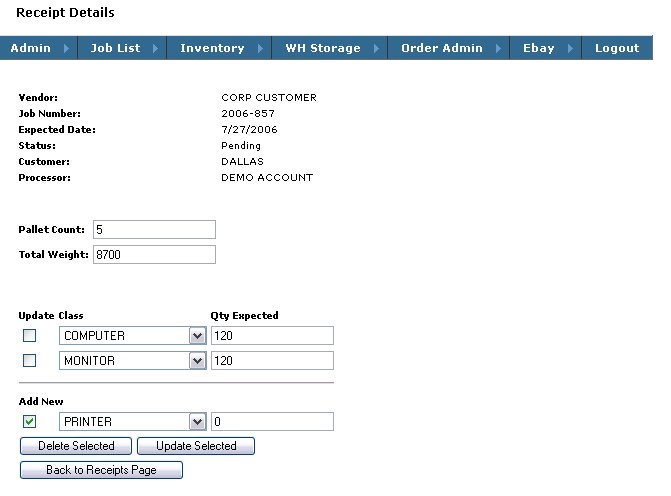
In this step record the expected quantities of each product class.
Select a class from the list, enter expected quantity and click Update Selected
This example shows two Product Classes already added with Printer about to be added to the list
To update any items click the select box next to the item, update the corresponding quantity and click Update selected.
When items are added click Back to Receipts Page
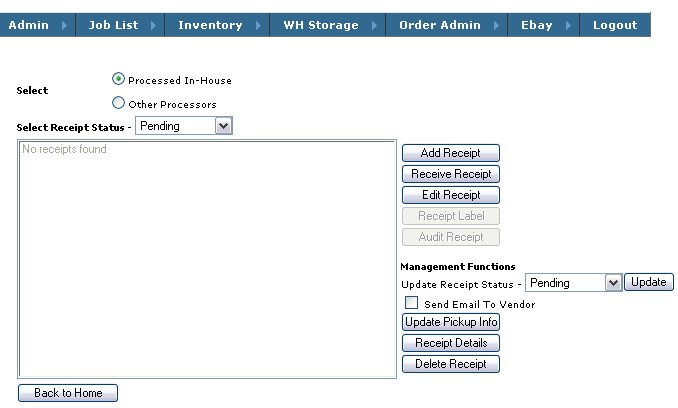
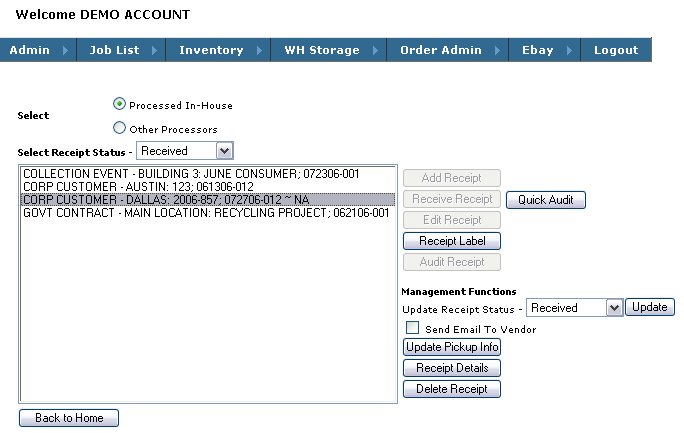
You will now see an item in the listbox which represents the receipt you have just added.
Notice that the select box for Receipt status is set to Pending.
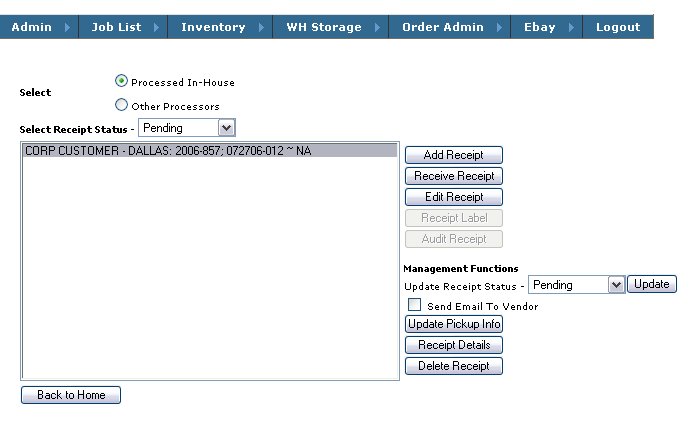
Receipts have several status levels:
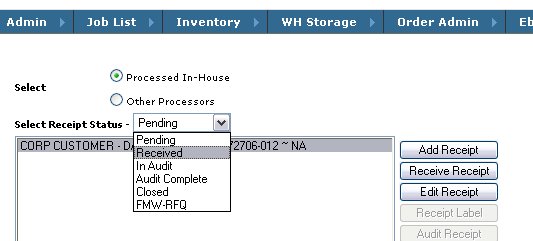
This select box allows you to filter the view of the different statuses for the receipts in the system.
Different functionality is available for each status.
Receive Receipt Process
When items arrive at the loading dock and are ready to be received into inventory, we need to find the Receipt in the system and flag it as being received.
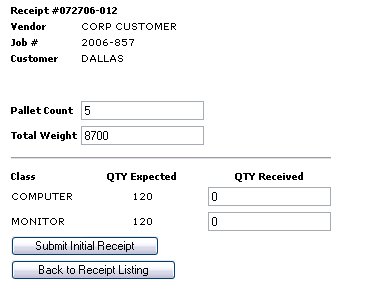
Enter actual number of pallets total weight received
( Note the system pulled in the pallet count and weight which was entered when the receipt was set up). Also enter the qtys for each item.
Click Submit Initial Receipt
On submit several things happen:
1. An email is sent to both the Vendor contact and the Recycler / Remarketer contact, containing information about the receipt which has been received
2. the system generates a supplemental pallet tag containing all information about the job
The Audit Process.
For Receipts which have arrived and which have been received into the warehouse, the next step in the process is the Audit.
Change Receipt Status
In order to start the Audit process the status of the receipt must be changed from Received to In Audit.
The receipt will now be visible in the above window with the Status of In Audit along with all of the other concurrent jobs with the same status
Note: the status will also be updated on the Job List dashboard.

Handling Bulk, weight Based Materials:
For product which is weight based, use the Quick Audit process
For goods where serialized asset management is needed we will use the standard Audit process:
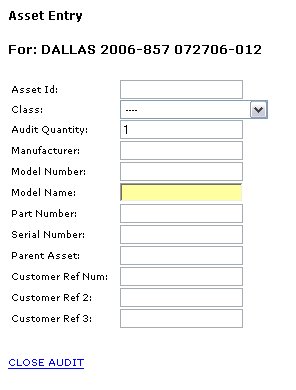
Highlight the Receipt you want to Audit and click Audit Receipt
This will load the Audit screen. All of the receipt / job / customer information is pulled into the audit record.
